

I’ve been working on a school paper for the last few days. Sorry about no posts.
Due tomorrow. Only 6 pages left…
Filed under: Uncategorized | Leave a comment »
I’ve been working on a school paper for the last few days. Sorry about no posts.
Due tomorrow. Only 6 pages left…
Filed under: Uncategorized | Leave a comment »
I was checking out some OpenOffice extensions the other day, and I found some neat ones. One of the best I saw was to get tabbed windows. I got it, as well as a few others.
Unfortunately, it is very buggy, and I do not like it at all, at least not right now. It is very bad. Possibly the worst part is that OpenOffice crashes when I go to the extension manager to remove it. I don’t want it, but can’t remove it…
I can’t even find a way to start OO without any extensions, similar to the ‘safe mode’ firefox has. Then I could remove it easily.
The only way I can find is to manually delete the extensions. To do this isn’t too hard:
Simple, but it works well. Note that this assumes you installed the extensions as the local user, not for all users. I did, so that’s what I fixed here. A bit more research shows how for all users. I haven’t tested this.
For extensions installed for all users, do the same as above. However, instead of ~/.openoffice.org2/user/uno.packages, rename /usr/lib/openoffice/share/uno.packages. This should work the same. the only difference is that you need to be root to rename or delete the folder. The easiest way to get into root is to do it via command line. Navigate to the directory and do ‘sudo mv uno_packages uno_packages_no’.
If you really want to use the gui, open a terminal and run ‘sudo nautilus’. Do not do anyhting else in Nautilus as root. Very bad things will happen. Just do what you came to do, and exit it.
Back to normal =]
Filed under: Uncategorized | 2 Comments »
I’m not sure if anyone is actually using my compatibilizer script apart from myself, but I updated it to handle another method of specifying the max version. This update covers both types now.
To use it, simply use it insteadof the original. If you installed it, just re-run the install-compatibilizer script with the new compatibilizer in the same folder.
Link to update is here. I’m trying to find a decent file hosting service for free, as I have no money. This time it’s FileFactory. I’ll see how it works out.
The link to the original script and details:
More on installing incompatible Firefox addons.
Filed under: Uncategorized | Leave a comment »
My phone is Bluetooth capable (It’s a standard RAZR). The only reason I personally use the Bluetooth is to transfer my pictures and videos over to my computer so I can use them to illustrate articles about pencil sharpenings.
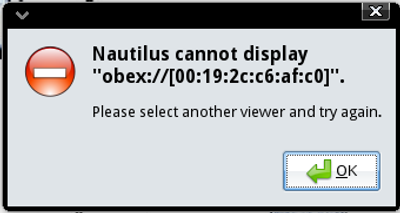
However, Ubuntu is not very well equipped to handle transferring files by default. It can connect to your phone, but then you’ll probably get a message saying something along the lines of ‘obex:[00:11:22:33:44] is not a valid ocation’ (the number being the MAC address of the phone).
As such:
Well, this is infact a very easy problem to solve. All you need to do is install one package, which gives Nautilus the ability to view obex ftp connections.
To install it, run ‘sudo apt-get install gnome-vfs-obexftp’. Or you could search for it in Synaptic if you feel like wasting time. The package is all of 164kb, but it does what we need it to do. I am mystified as to why it is not included in Ubuntu by default.
The contents of my phone in Nautilus:

There we have it. You can now do whatever you want with the contents of your phone. And you can do it all within your own Nautilus. Note that this won’t work if, say, your phone is ridiculously crippled. T-Mobile is pretty good on leaving functionality in their phones. I can do anything with Bluetooth on mine, including add mp3 ringtones.
Good Luck! Hope this is useful.
Filed under: Uncategorized | Leave a comment »
I don’t really notice icons that much normally. The normal gnome ones seemed fine. However, one of the new features in Firefox 3 is that it takes the icons, such as the forward and back buttons, home, etc. from your local theme. This feature is great, as it allows the browser to fit in with the system better. It also almost eliminates the need to find a nice theme that matches. Just find one icon theme, and it applies everywhere. Very nice.
Here are my previous icons, as shown in FF3:

I found a new icon theme at gnome-look.org ( great resource for stuff to dress up Ubuntu, by the way). It’s called Ultimate Gnome, and it looks like the creator put a ton of time into it. Supposedly it has about 800 icons…
It is a really nice theme that covers everything, not leaving any blank spaces like others. Also, the icons all go together very well. The theme is a bit blue, but not too much.
The link:
To install the icons is quite simple. In your home directory, create a folder called ‘.icons’ if it doesn’t exist yet. Now extract the folder called Ultimate Gnome into it so that you have the ‘Ultimate Gnome’ folder inside of the ‘.icons’ folder.
Now, the new icon them will show up in System > Preferences > Appearance. Click ‘Customize’ at the bottom, go to ‘Icons’, and select ‘Ultimate Gnome’. Firefox 3 will need to be restarted to see the chages, but they will show up immediately almost everywhere.
Here is the same shot with the Ultimate Gnome theme:
Filed under: Uncategorized | Leave a comment »
I now have flash working properly in Firefox 3 as well as Firefox 2 on my system!
Until now, I could not find a way to get my perfectly working flash from FF2 to translate to Firefox 3. It was killing me. I don’t particularly like flash, but it is an excellent way to view videos online, and needed for many websites, unfortunately.
Whenever I got the ‘Plugin needs to be installed to niew this content…’ error bar, I would try to install and it said that I already had Flash installed.
While reading a thread on installing Firefox 3 the hard way, I found a comment that explained what was wrong. The plugins were only installing to the FF2 plugins dir, not FF3.
To get Flash working in FF3, run this command:
‘sudo cp /usr/lib/firefox/plugins/* /usr/lib/firefox3preb3/plugins’
Note that the ‘firefox3preb3’ line might be different on yuor system. That was mine. It will be something obvious and similar, though. Just ls first to see what it is called.
This works perfectly, and all of the plugins now work! Firefox 3 is addictive. You can’t go back once you use that awesome url bar for a while. It can read your mind.
For getting some plugins to work, you need to link them. To do this, do ‘sudo ln -s -f /usr/lib/firefox/plugins/libjavaplugin.so /usr/lib/[your FF3 dirname]/plugins/’. This will link it, and now Java will work (after a Firefox restart, of course). This may link other stubborn plugins as well. YMMV.
Thanks to Solarwind from the Ubuntu Forums for finding the solution to the Java problem.
Some working Flash for proof.

Filed under: Uncategorized | 8 Comments »
I found this a few minutes ago. It has so much insight into Americans today that I couldn’t help but laugh. Then cry.
Anyways… Go look at it:
This guy apprently put funny remarks on about 250 pictures. The nice part is, they are actually funny. A nice change from the usual, at least. At first I thought it was another stupid collection of fake motivational posters. (Interesting fact: I actually saw one of those at my school today. Did the fake posters kill the real ones? I never see them anymore.)
Filed under: Uncategorized | Leave a comment »
I tend to change my background picture almost constantly, so I decided to find a program that would do it for me.
I’m using Wallpaper Tray right now. You can get it with ‘sudo apt-get install wallpaper-tray’. It changes wallpaer either at logon, timed, or both. It allows you to specify the directories it searches for the images.
Currently I have it rotating my XKCD comic collection centered on a simple white background. A fitting treatment for my favorite webcomic ever.
By the way, you can get the XKCD comics here.
The tray icon shows a tiny version of the current wallpaper. Much better than just some static icon.
My new desktop (again =P):

Filed under: Uncategorized | Leave a comment »
Well, lately my roommate’s pencil sharpener has been acting up, not wanting to work. The thing is, this is the best sharpener ever. It works miracles on dull pencils. Its an oldish Boston office sharpener. I want one so badly.
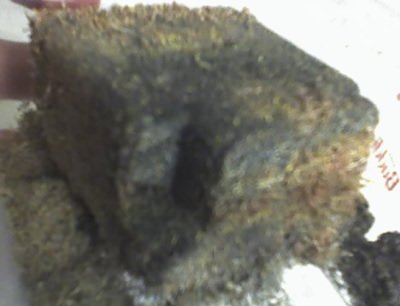
Well, my neighbor got this brilliant idea that it might be full! Guess what? He was right. When we took out the tray, it was packed with the by-products of sharpened pencils. Considering it hasn’t been emptied in 7 months at least, and it gets used ~5 times a day…
Here are some pictures of the cube. It was so dense it kept it’s shape when removed from the tray. Sorry the pictures are so blurry, I took them with my phone’s camera. It is all I have access to.

Filed under: Uncategorized | 1 Comment »
I was bored, so I decided to make a shell script to automate the process of making a firefox extension work with all versions.
It was quite a learning experience, being my first decent shell script.Note that in all likelihood it sucks, and barely works. But it *does* do what it’s supposed to do. At least on my computer.
There are two ways to do it. Installation or no-install. For either one, download this. It is the actual script. To use it, put it and the .xpi extension (see my previous post on this) in the same folder. Note that there must be only ONE .xpi file in that directory. More than one will result in bad results and deleted files (the source extension is deleted).
Now, run ‘sudo chmod +x compatiblizer’ in that directory. Then, changing it is as easy as ./compatibilizer. The original extension will be deleted, and a new one, called compatibilized-ffx-extension.xpi.
Just install that as usual in Firefox. Again, see the original article for details.
For the install route, download this. Put it wherever you want, as long it is in the same dir as the other one. Now run ‘sudo chmod +x install_compatibilizer’.Now run ‘sudo ./install_compatibilizer’ to install it. These two files can now be deleted, or whatever you want to do with them.
To convert extensions, simply put the extension into a directory by itself and run compatibilizer while in that directory. The same result will be produced. This can be used forever now.
Now doing this is a *bit* easier, or at least more informative.
Note that older extensions tend to not work quite as well with the Betas as the Alphas. Bigger difference, I guess. Many do still work, and just need this change to run.
The original article (that this automates.
If you have problems, leave a comment. If you like it, leave a comment. Just leave a comment.

Full contents of script:
#!/bin/bash
#Daniel’s Firefox extension compatibilizer!
#Warning! This script is untested on anything but my computer. However, it uses only standard system tools, so it should be fine anywhere.echo ‘Starting extension compatibilizer.’
echo ‘Unzipping to temporary directory.’
mkdir temp
unzip -q *.xpi -d temp/
rm *.xpi
cd temp/
cp install.rdf install.rdf.backup
echo ‘Replacing max version number…’
sed ‘s|.*|5.0|’ install.rdf
echo ‘Done replacing max version number’
zip -q -r temp.xpi *
echo ‘Remade extension.’
echo ‘Moving extension.’
mv temp.xpi ../compatibilized-ffx-extension.xpi
echo ‘Extension moved. Deleting temp dirs.’
cd ../
rm -r temp
echo ‘Done! Install it and have fun.’
Filed under: Uncategorized | 5 Comments »
